
Projects can be made shareable with users outside of your organization.
Allow added Project members to invite others outside of globaledit
- Under the Projects tab or in the Projects option of the folder's 3-dot menu, select Add Project
- From the popup on the right side, click to toggle on or off Public Project
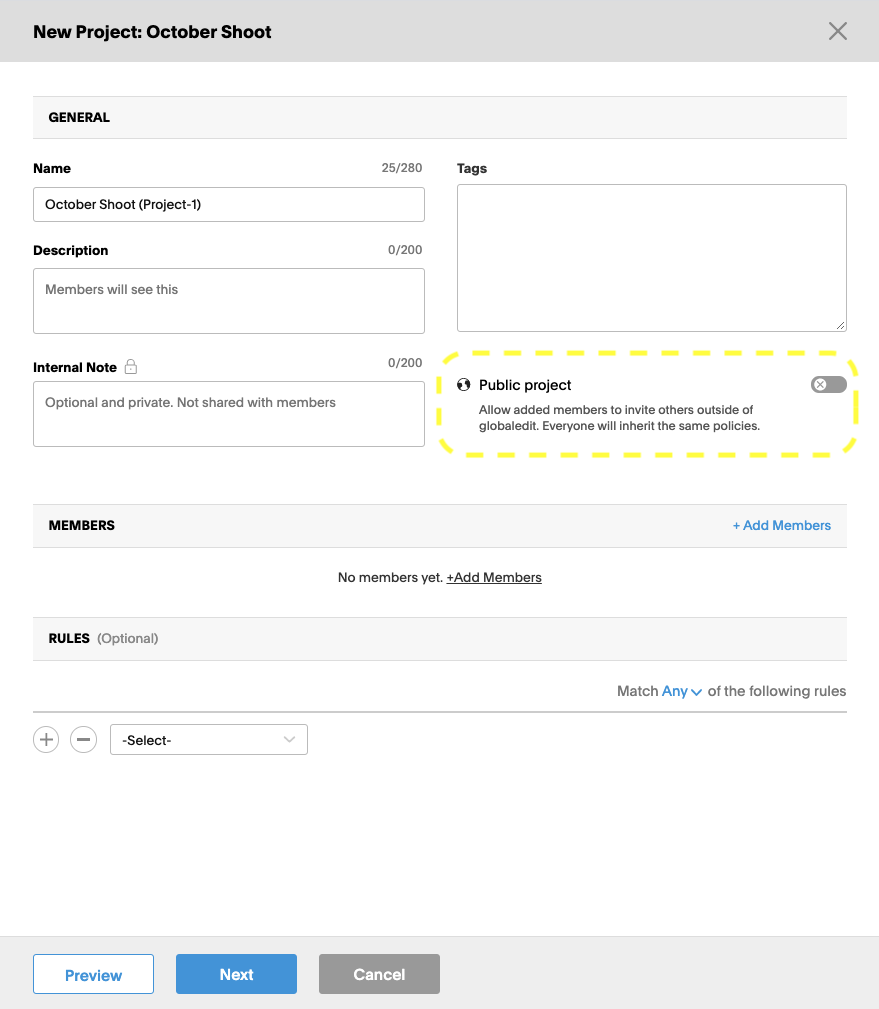
- Add policies or select a role from the dropdown menu
-
Invite members
- Set rules, if applicable
- Preview your Project or click Next, followed by Create & Send Invites
Invited recipients of the Project will receive an email with a Magic Link to login.
Public Project Important Information
- Anyone who has access to a Public Project can share openly outside your organization. Each recipient will be considered a billable user.
- Public projects will default to a 90 day expiration date. This can be changed by adjusting the date within the calendar.
- To easily identify public projects, when the toggle is on, the name of the Project will display with “Project 1 - Public” in your Projects tab list and either Public or Private in the Visibility column of your Projects:
![]()
![]()
- Anyone who receives the public Project from a recipient will inherit the same policy structure as the sender. Recipients cannot set new policies on Projects that have been shared with them.
We're here for you!
If you have any additional questions, please don't hesitate to let us know!
Email: support@globaledit.com
Phone: (888) 433-4801
Hours: Monday - Friday 9AM to 9PM Eastern Standard Time
Comments
0 comments
Please sign in to leave a comment.