Creating a custom schema is a great way for an organization to add metadata to assets with values that are meaningful to the organization. Adding your own custom schema is easy for any user with the admin permission on the Organization level. With custom schemas, add relevant information, such as SKUs, keywords, model info, season.
Creating a Custom Schema
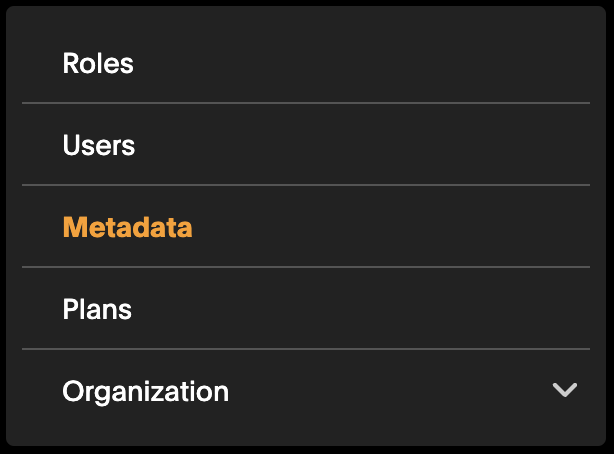
- Begin by selecting the Admin panel, then click on Metadata located on the left side of the page.
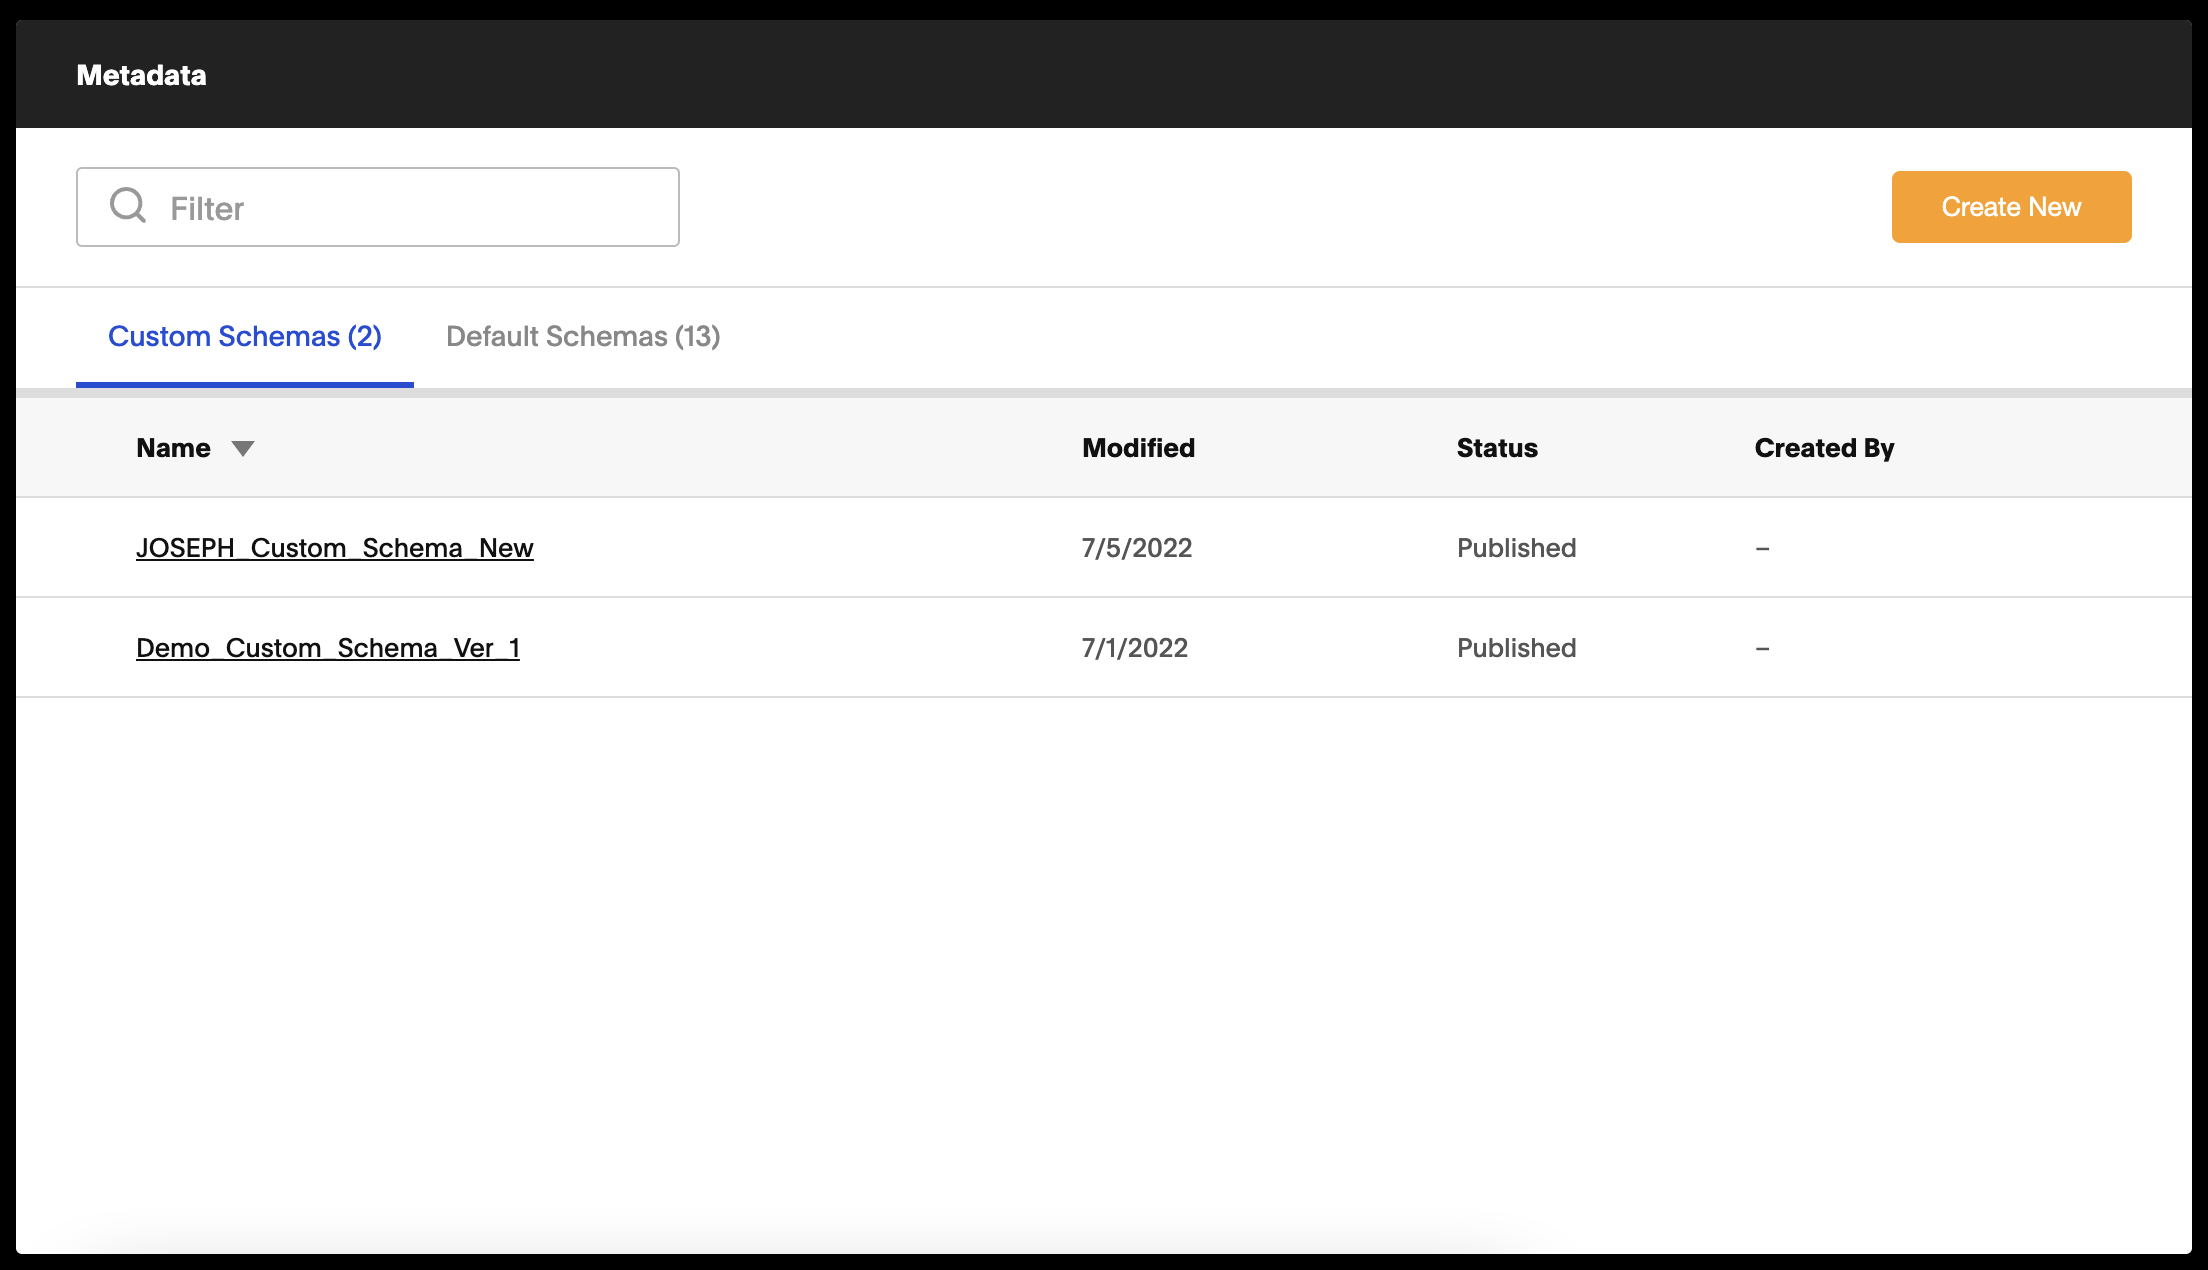
- Next select Create New on the far right side of the window.

- This will open up a Custom Schema page.
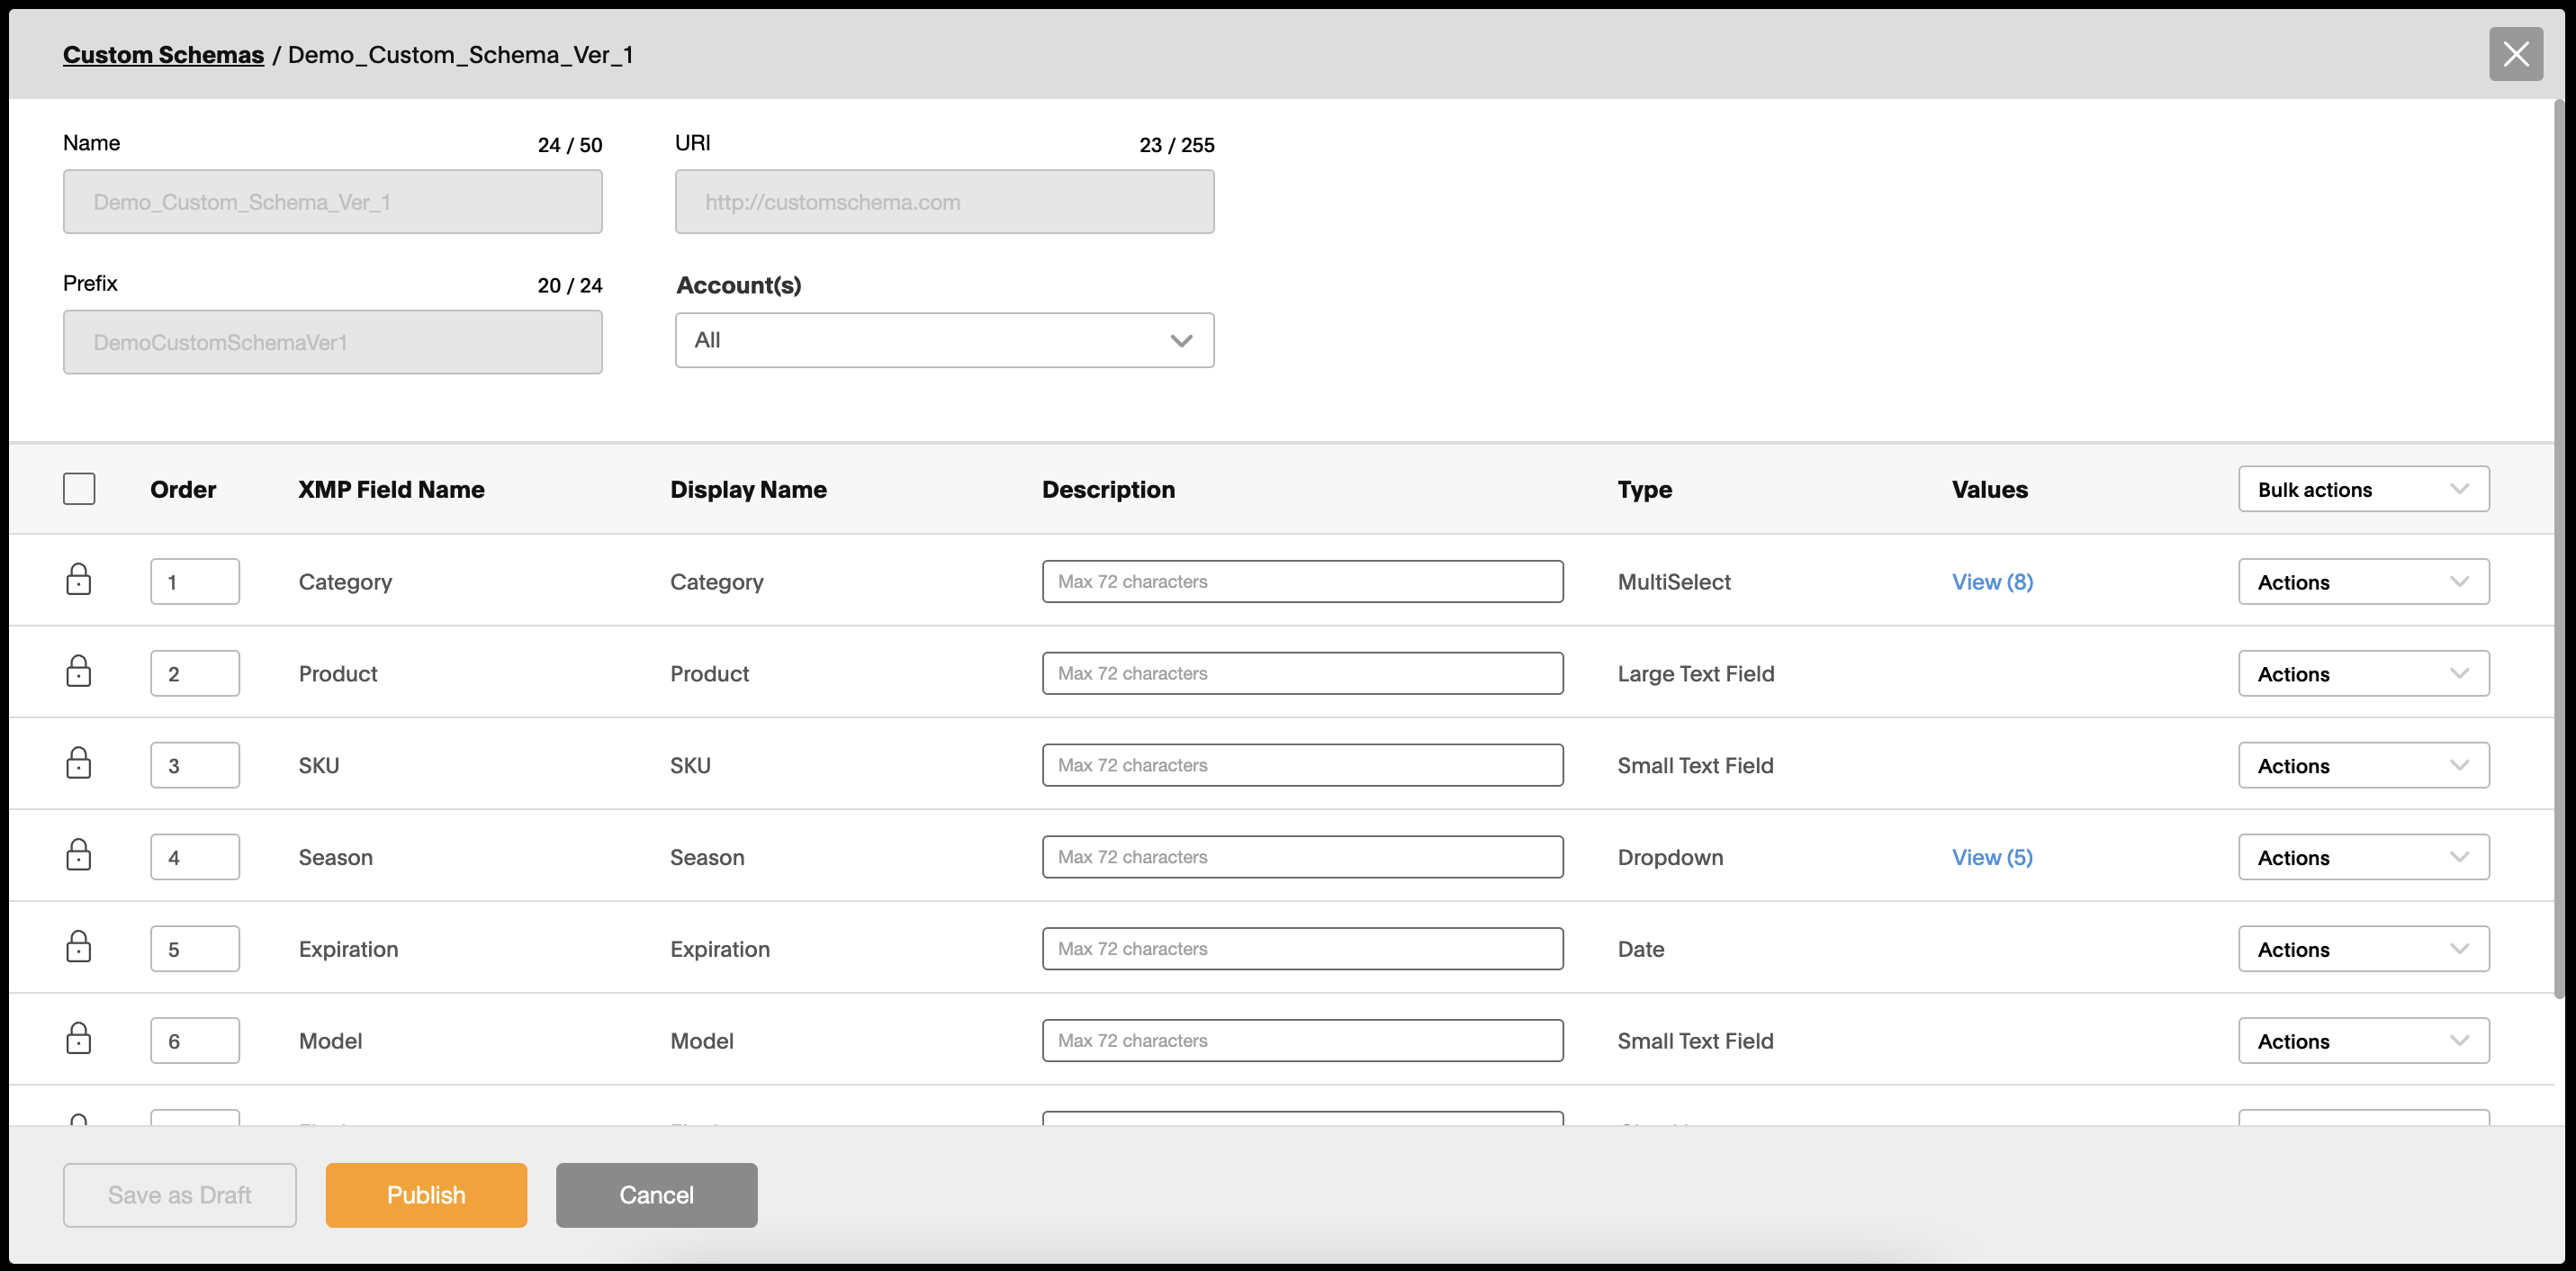
- Within this page, enter details that will define the custom schema.
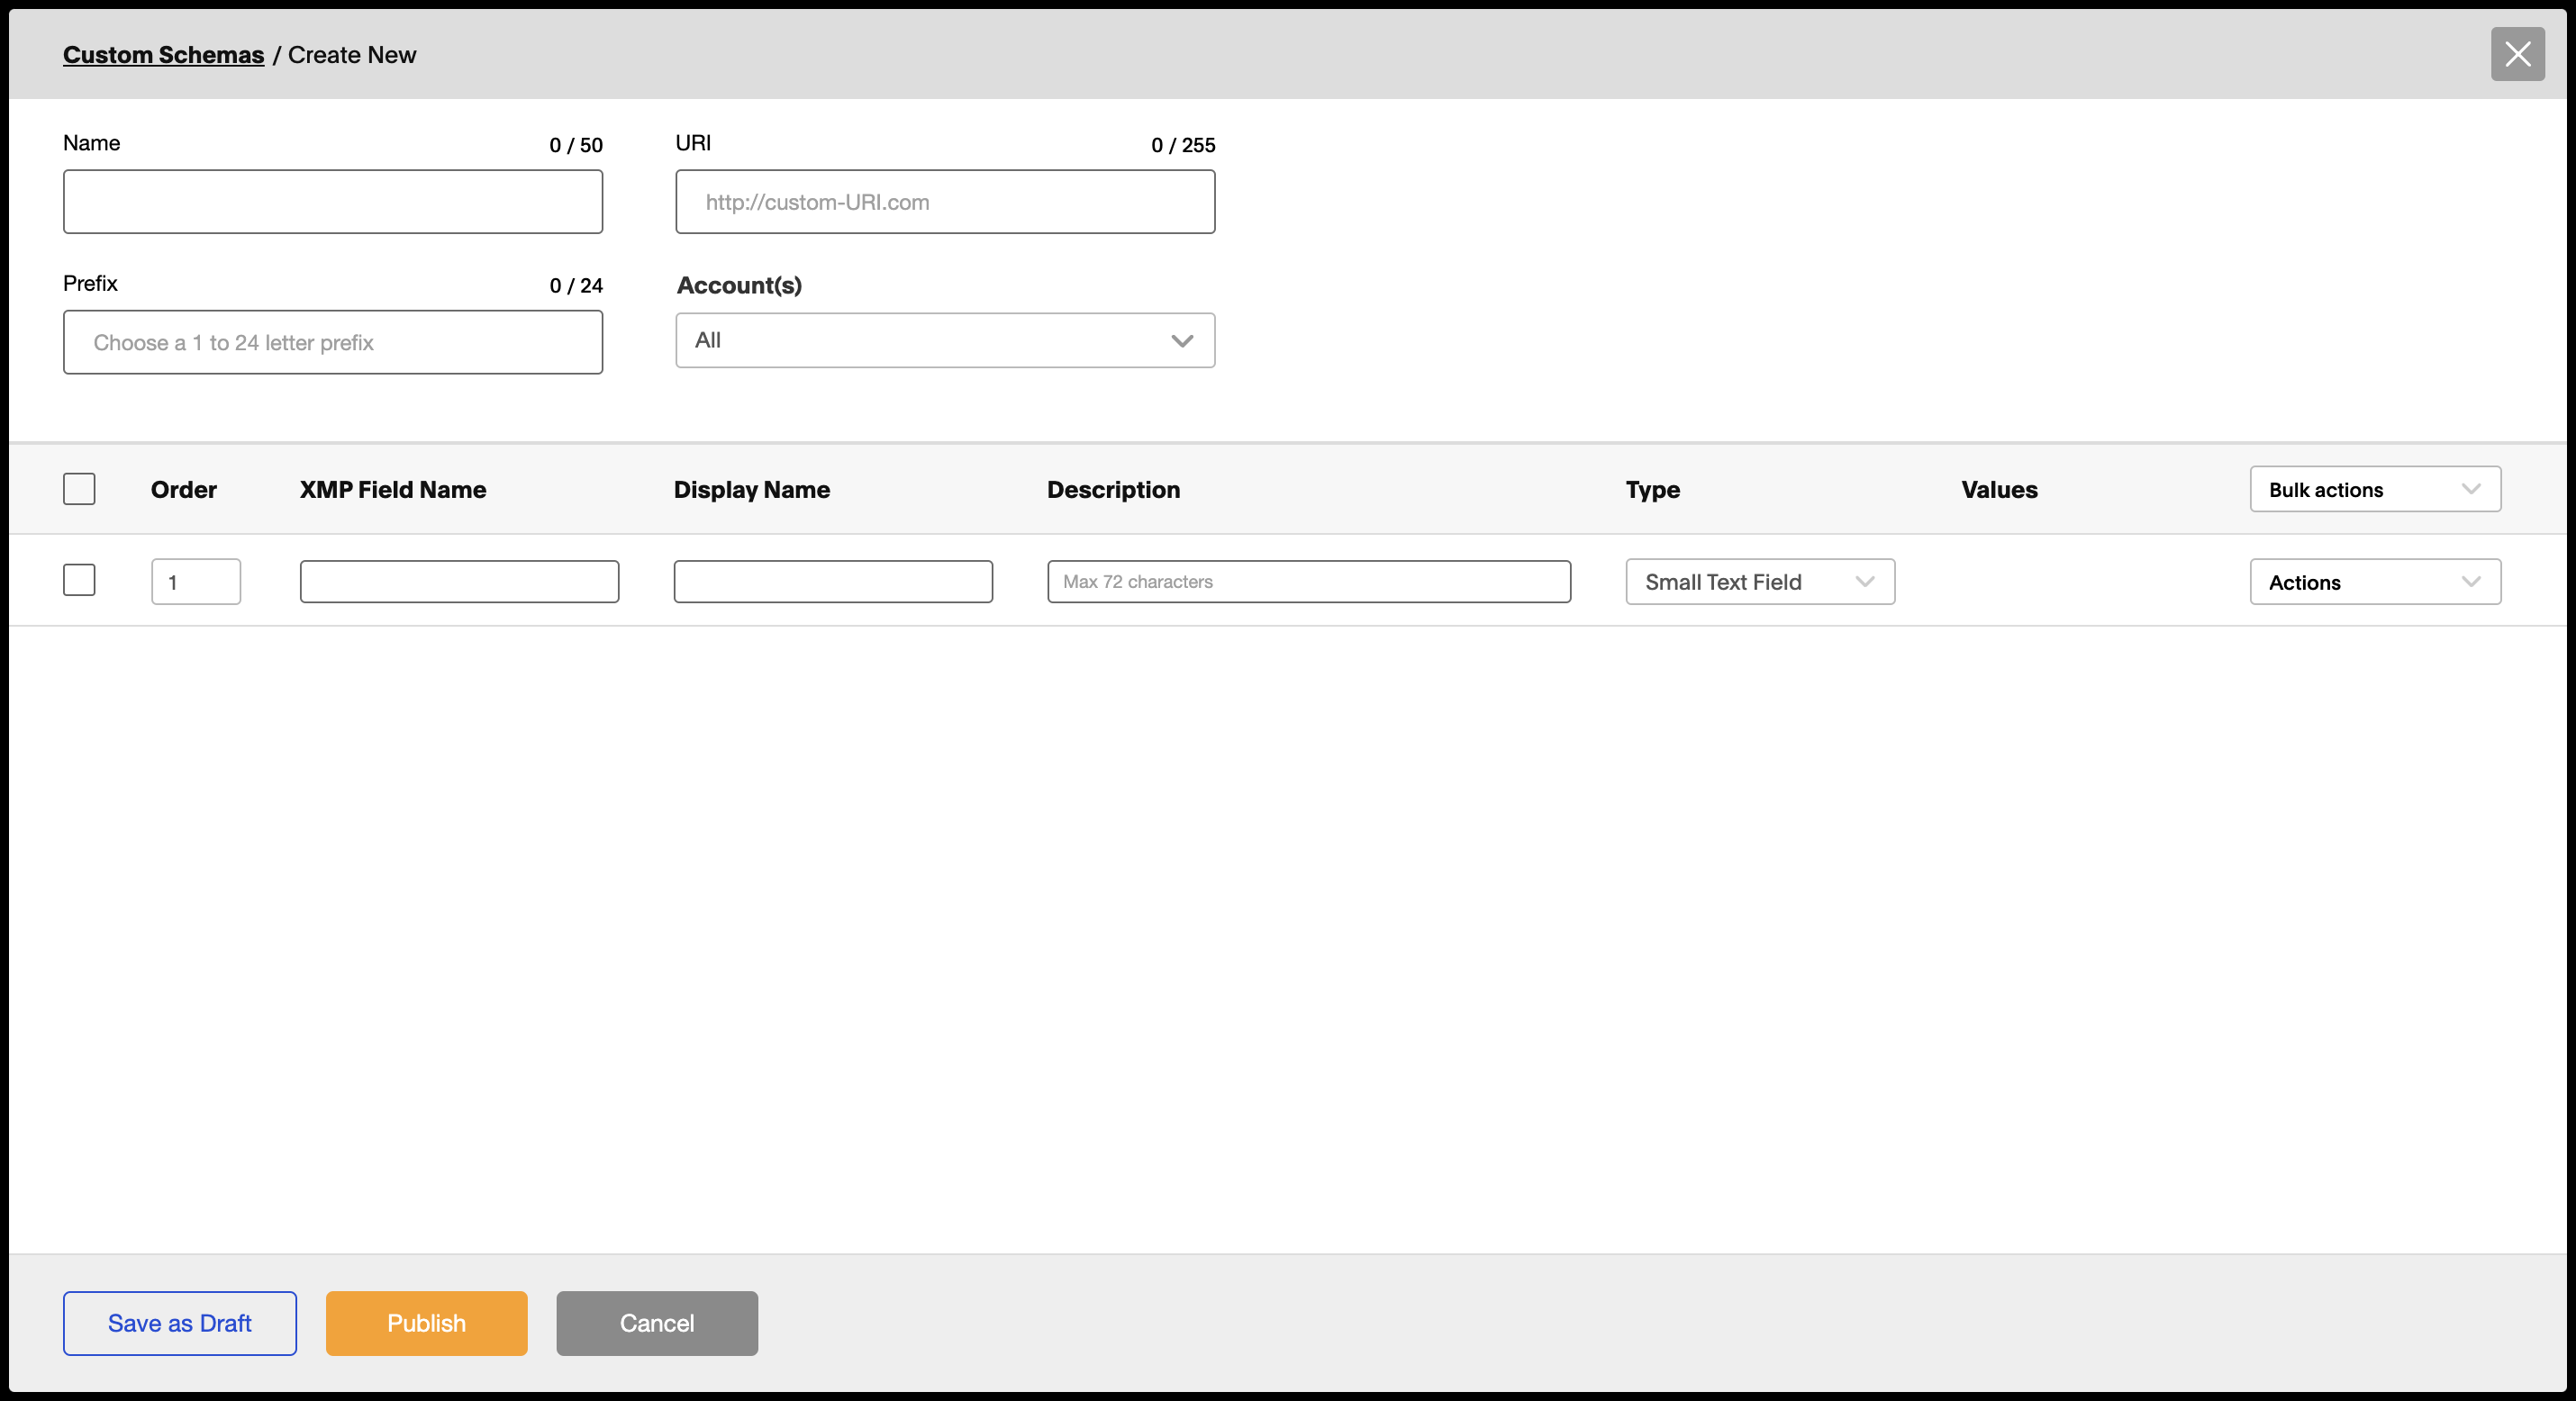
- Name - how it will appear in the Metadata Schema drop-down menu in the Metadata Editor.
- URI - does not have to be a registered URL, used by external applications to read the XMP metadata
- Prefix - 2 to 3 letters that describe the schema, used by external applications to read the XMP metadata
- Accounts - Choose the Account Group and/or Account to make the schema available to its users. If an account is not specified, it will be available for the entire account group
The bottom half of this page is dedicated to your custom schema fields.
- XMP Field Name - This name of the specific field
- Display Name - Can be the same as the XMP Field Name without uses spaces
- Description - Can be left empty
- Type
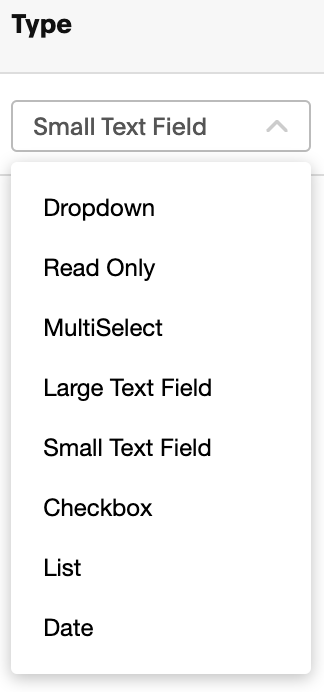
- Dropdown - gives the user the ability to add values that will appear in a dropdown menu. Only one value can be selected.
- Read Only - this is a field in which will display information that is uneditable
- MultiSelect - multiple values can be selected in a dropdown menu
- Large Field Text - a larger text field
- Small Field Text - a singular line text field
- Checkbox - option to check or uncheck
- List - a list to choose options from
- Date - implements a calendar link to target a specific date
- Type
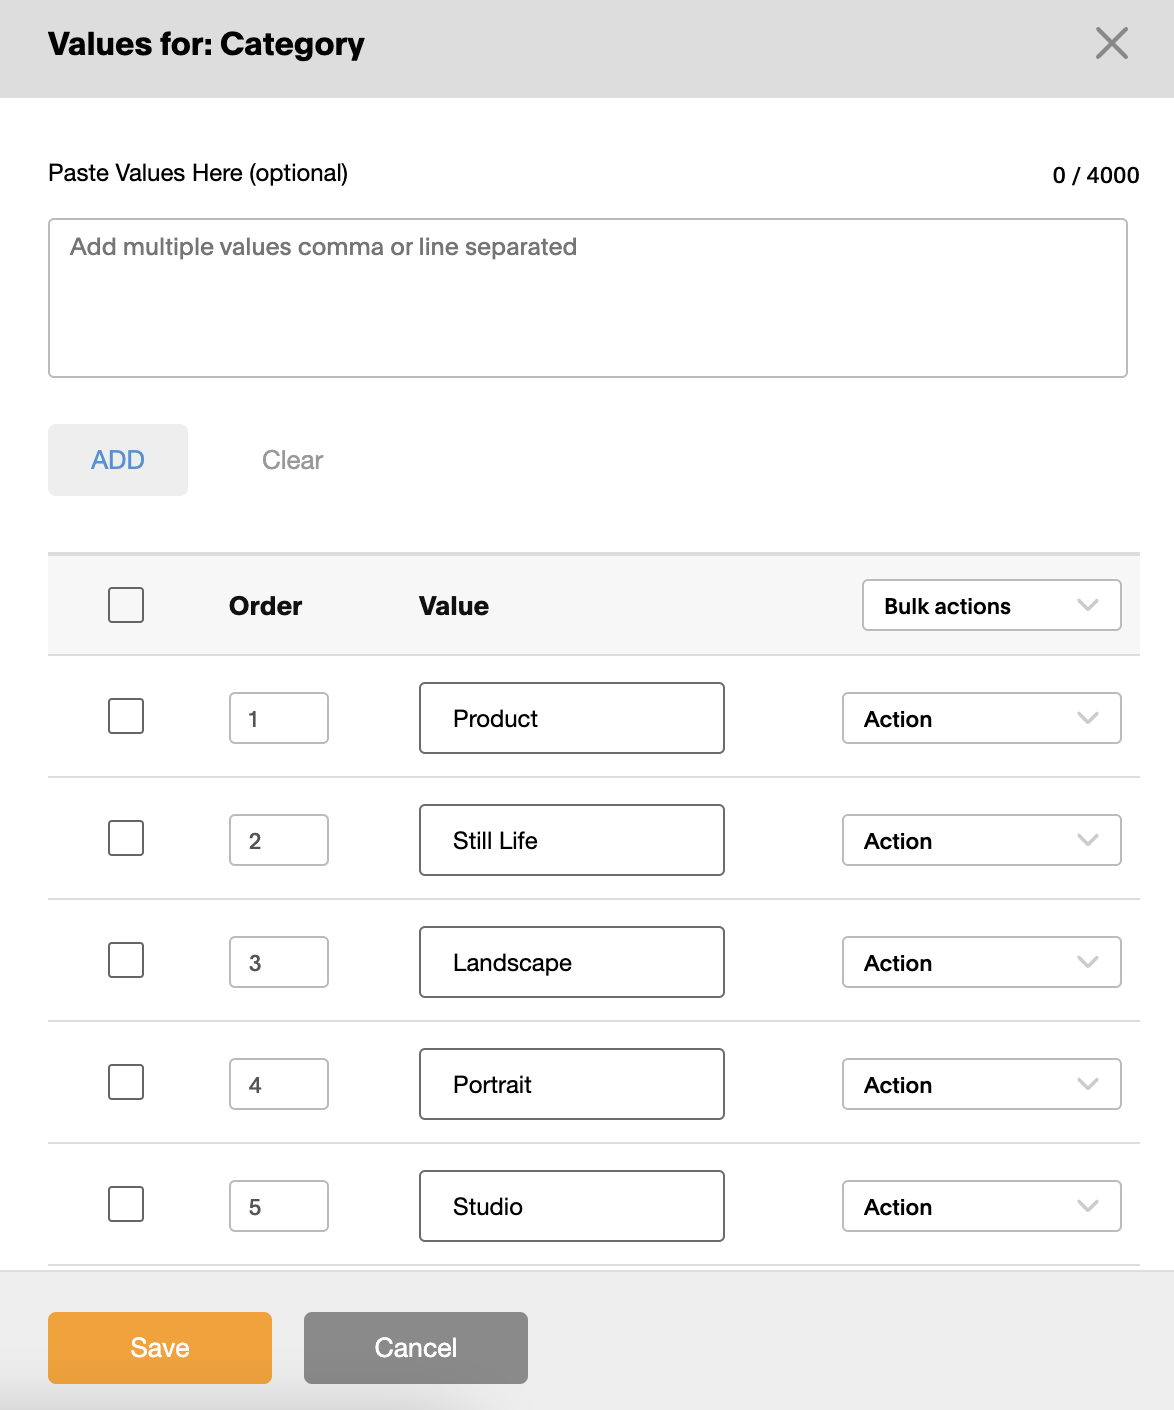
- Values - if selecting Dropdown or MultiSelect as a Type, the user then has the ability to add additional subfields that will populate in the Dropdown or MultiSelect fields.
- Bulk actions will allow you to Add Row, increasing your order count of fields, or Remove Row, decreasing your order count of fields.
- Once you have completed entering your Schema Metadata, select Save as Draft. You still retain the option to continue adding Metadata fields until you select Publish.
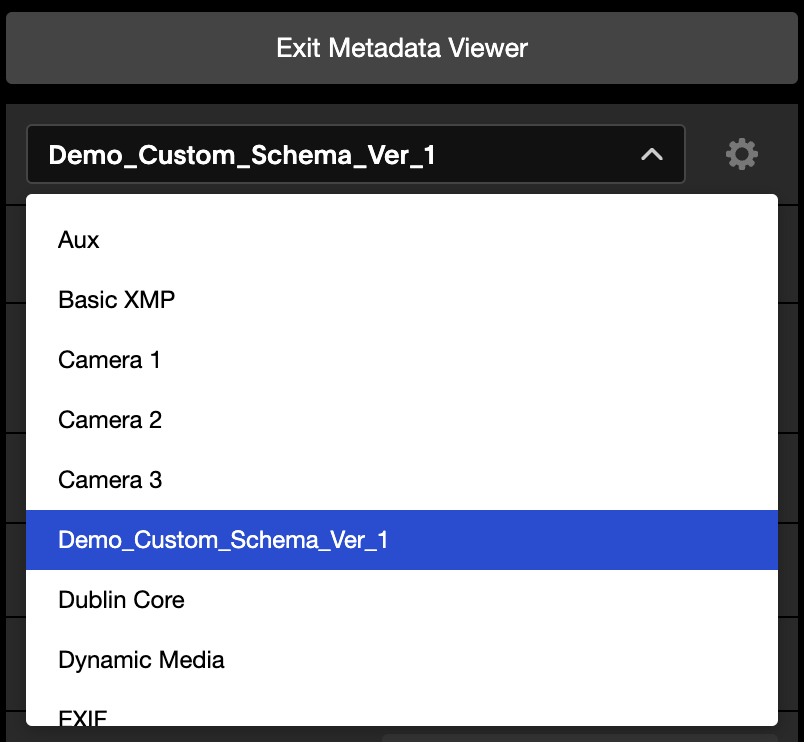
Immediately after the Custom Schema has been Published, it will populate on the Metadata page under Custom Schemas.
You will now have the option to select this custom schema by selecting an asset(s) and entering the Metadata Viewer. A custom metadata schema has been successfully created.
![]()
We're here for you!
If you have any additional questions, please don't hesitate to let us know!
Email: support@globaledit.com
Phone: (888) 433-4801
Hours: Monday - Friday 9AM to 9PM Eastern Standard Time
Comments
0 comments
Please sign in to leave a comment.